Keeping your air fryer clean is important for both taste and safety. Many people focus on the basket and pan, but often forget about the heating element. This part sits above the food and collects grease and crumbs with every use. Over time, a dirty heating element can smoke, smell bad, or even stop working properly. The good news is you don’t need harsh chemicals to clean it. Baking soda is a gentle, effective cleaner that can help your air fryer last longer and cook better. If you want to know how to clean an air fryer heating element with baking soda, you’re in the right place. I’ll walk you through each step, share practical tips, and explain what to avoid.
Why Cleaning The Air Fryer Heating Element Matters
Most air fryer users clean the basket regularly but ignore the heating element. This is a mistake. When grease, oil, or food bits build up on the element, they can:
- Cause smoke during cooking
- Create bad odors
- Affect the taste of your food
- Make the air fryer less energy efficient
- Shorten the lifespan of the device
The heating element works like a broiler in an oven. If it’s dirty, everything you cook is affected. Cleaning it with baking soda is safe for most models and avoids damage that can come from strong chemicals.
What You’ll Need
Before you start, gather these items:
- Baking soda (about 2-3 tablespoons)
- Warm water (1/2 cup)
- Soft brush (a toothbrush or small paintbrush)
- Microfiber cloth or soft sponge
- Paper towels
- Small bowl
- Old toothbrush (optional for tough spots)
- Towel or mat for drying
Most of these items are likely already in your kitchen. Never use metal brushes or abrasive pads, as these can scratch or damage the heating element.
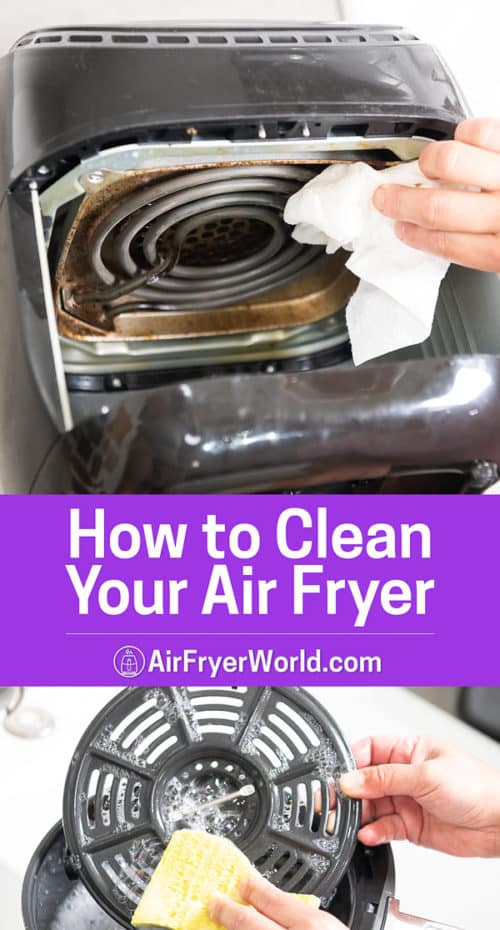
Credit: airfryerworld.com
How To Clean Air Fryer Heating Element With Baking Soda
Cleaning the heating element is simple if you follow these steps. For best results, do this every 1-2 months or whenever you notice smoke or smells.
1. Unplug And Cool Down
Safety comes first. Unplug your air fryer and let it cool completely. The heating element stays hot for a while after cooking, so wait at least 30 minutes.
2. Remove The Basket And Pan
Take out the basket and pan. Wash these as usual with warm, soapy water and let them dry.
3. Turn The Air Fryer Upside Down
This gives you better access to the heating element. Place a towel underneath to protect the counter and catch any drips.
4. Dry Brush First
Use a dry soft brush or toothbrush to gently loosen and remove loose crumbs or burnt-on bits. Brush in one direction to avoid pushing debris further inside.
5. Make Baking Soda Paste
In a small bowl, mix 2-3 tablespoons of baking soda with just enough warm water to make a thick paste (not runny). This paste sticks to the element and helps break down grease.
6. Apply The Paste
Dip your brush or sponge in the paste. Gently apply it to the heating element and the surrounding area. Do not soak the element—just coat it lightly. Let the paste sit for 5-10 minutes. This gives baking soda time to lift grime and neutralize odors.
7. Wipe And Scrub
Use a damp microfiber cloth or sponge to wipe away the paste and loosened dirt. For stubborn spots, a toothbrush can help. Avoid using too much water—air fryer parts don’t like moisture.
8. Rinse With Damp Cloth
Wipe the area with a clean, damp cloth to remove any leftover baking soda. Go over the element and nearby areas until you see no white residue.
9. Dry Completely
Pat the heating element dry with a paper towel. Leave the air fryer open for at least 30 minutes to air dry completely before plugging it back in.
10. Reassemble
Once everything is dry, put back the basket and pan. Your air fryer is ready to use again.
Comparison: Baking Soda Vs. Other Cleaning Methods
Some people use vinegar, special sprays, or just soap and water. Here’s a quick look at how baking soda stacks up against other methods.
| Method | Effectiveness | Safety | Odor Removal | Ease of Use |
|---|---|---|---|---|
| Baking Soda | High | Very Safe | Excellent | Easy |
| Vinegar | Medium | Safe | Good | Moderate |
| Soap & Water | Low | Safe | Fair | Easy |
| Chemical Sprays | High | Can Be Harmful | Good | Moderate |
Baking soda is the best mix of safety, cost, and power for most home cooks. It’s non-toxic, odorless, and won’t harm most air fryer parts.
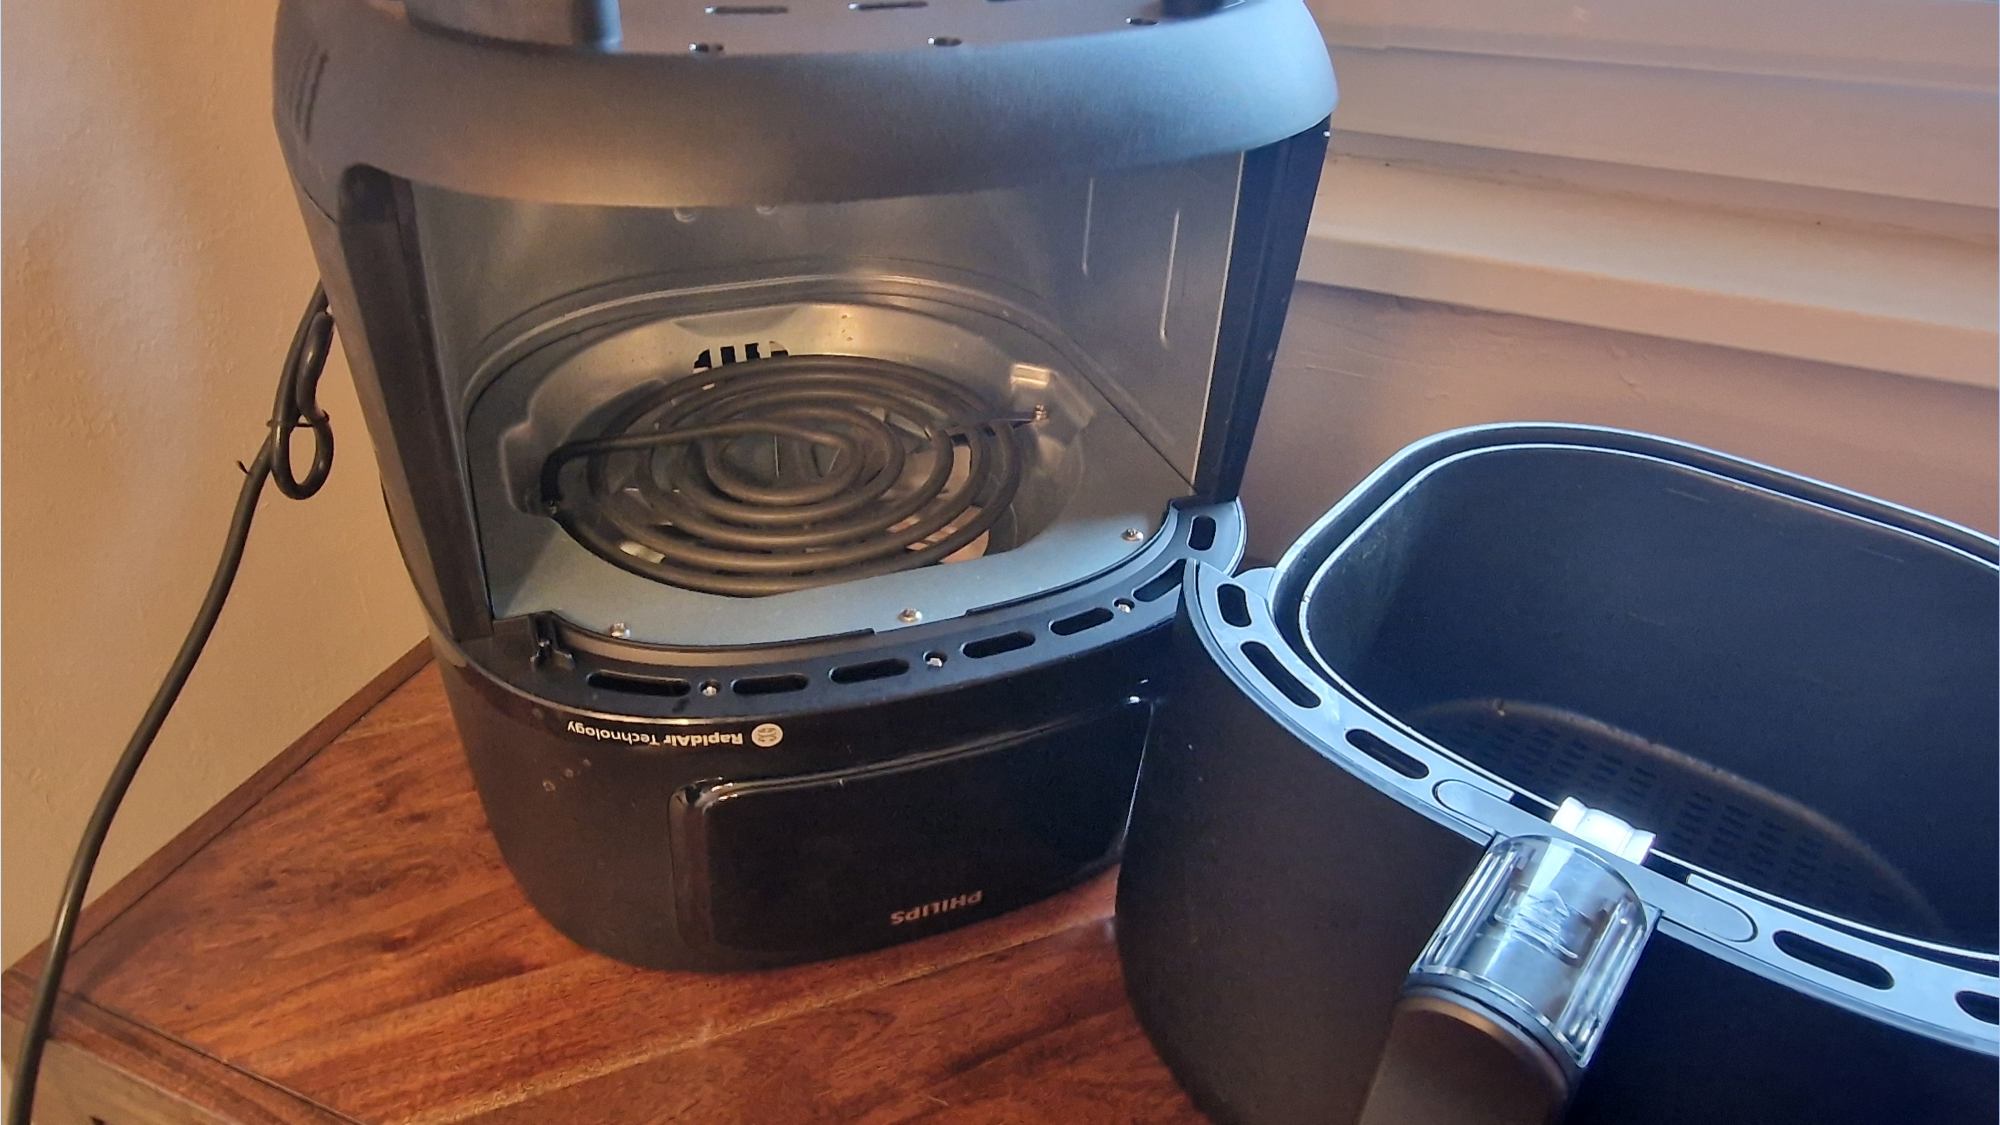
Credit: www.tomsguide.com
How Often Should You Clean The Heating Element?
How often you clean depends on how much you use your air fryer and what you cook. As a rule:
- Light use (1-2 times/week): Clean every 2-3 months
- Medium use (3-5 times/week): Clean once a month
- Heavy use (daily or greasy foods): Clean every 2-3 weeks
If you notice smoke, strong smells, or visible grime, clean sooner. Regular cleaning keeps your food tasting fresh and your air fryer working well.
Signs Your Heating Element Needs Cleaning
It’s not always obvious when the heating element is dirty. Watch for these clues:
- Smoke coming from the air fryer during cooking
- Burnt smells even with simple foods
- Uneven cooking or food taking longer to cook
- Visible grease or food bits on or around the element
- Decreased performance (foods not crispy or cooked well)
If you see any of these, it’s time to clean.
Common Mistakes To Avoid
Cleaning the heating element is simple, but there are a few mistakes that can cause problems:
- Using too much water: Moisture can damage electrical parts. Always use a damp, not wet, cloth.
- Scrubbing with metal or abrasive pads: These can scratch the element or remove protective coating.
- Not letting it dry: Moisture left on the element can cause rust or electrical problems.
- Forgetting to unplug: Always unplug before cleaning to avoid shocks.
- Using harsh chemicals: These can damage the coating or leave harmful residues.
Practical Tips For Easier Cleaning
Over time, you’ll find a routine that works best for your model. Here are some tips to make cleaning faster and safer:
- Clean after greasy foods: Foods like bacon or wings release more grease. Wipe down the element after cooking these.
- Keep a small brush nearby: A dedicated old toothbrush makes quick cleanups easier.
- Check your manual: Some models have special coatings or warnings. Always follow the manufacturer’s advice.
- Don’t soak the element: Only the basket and pan are usually dishwasher-safe. The heating element should never be submerged.
- Use a flashlight: It helps you see grime hidden in shadows.
When To Call For Professional Help
If you notice cracked, bent, or heavily corroded heating elements, stop using the air fryer. Some problems can’t be fixed at home and may be dangerous. Contact the manufacturer or a professional repair service if:
- The element is badly damaged or loose
- There are sparks or electrical smells
- The air fryer won’t heat up after cleaning
Trying to fix these on your own can void your warranty or cause injury.
A Real-world Example
Let’s look at a common scenario. Sarah uses her air fryer daily for snacks and meals. After a few months, she notices smoke every time she cooks. She checks the basket—clean. But looking up, she sees brown, greasy buildup on the heating element.
Sarah mixes a baking soda paste and follows the steps above. After cleaning, the smoke and smell disappear. Her fries turn out crisp again, and the air fryer runs quietly. She now cleans the heating element monthly, and hasn’t had a problem since.
Baking Soda Cleaning Vs. Not Cleaning: Results Over Time
Here’s what happens if you clean regularly vs. not at all.
| Cleaning Schedule | Air Fryer Performance | Food Quality | Device Lifespan |
|---|---|---|---|
| Monthly Cleaning | Consistent | Always Fresh | 5+ years |
| Once a Year | Declines Over Time | Occasional Odors | 2-3 years |
| Never Cleaned | Poor, May Fail | Bad Smells & Taste | 1-2 years |
Regular cleaning is a small task that saves you money and hassle in the long run.
What If Baking Soda Isn’t Enough?
Sometimes, a single cleaning isn’t enough—especially after months of buildup. If grime remains:
- Repeat the baking soda paste method
- Let the paste sit longer (up to 30 minutes)
- Use a slightly firmer brush (but still soft bristles)
- Try a small amount of vinegar mixed into the paste for extra power
Never use sharp tools or knives. If residue still won’t come off, contact the manufacturer for advice.

Credit: www.reddit.com
Is Baking Soda Safe For All Air Fryers?
Most air fryer brands and models are safe to clean with baking soda. However, always check your user manual first. Some models have special coatings or parts that could react with even mild abrasives. If in doubt, test baking soda paste on a small, hidden area first.
You can find more on cleaning air fryers at Consumer Reports.
Frequently Asked Questions
How Do I Clean Stubborn Burnt Grease From The Heating Element?
Mix a thicker baking soda paste and let it sit on the burnt area for 20–30 minutes. Use a soft brush to scrub gently. Repeat if needed, but avoid using metal tools which can damage the heating element.
Is It Okay To Use Vinegar With Baking Soda For Cleaning?
Yes, you can combine vinegar and baking soda for extra cleaning power. Apply the baking soda paste first, then spray with vinegar. It will fizz and help lift stubborn grease. Always wipe clean with a damp cloth afterward.
Can I Put The Heating Element In Water Or The Dishwasher?
No. The heating element is an electrical part and should never be submerged in water or put in the dishwasher. Use a damp cloth or sponge only, and let it air dry completely before use.
How Do I Reach The Heating Element If It’s Hard To Access?
Turning the air fryer upside down gives better access. Use a flashlight and a long-handled brush or toothbrush. Work gently to avoid damaging any wires or connections.
How Do I Know If The Heating Element Is Damaged?
Signs of damage include visible cracks, warped metal, or sparks during use. If you notice any of these, stop using the air fryer and contact the manufacturer or a repair expert.
Keeping your air fryer heating element clean with baking soda is simple, safe, and effective. By making this part of your regular routine, you’ll enjoy better-tasting food, fewer problems, and a longer-lasting appliance. A few minutes of care now can save you hours of frustration later.

Kitchen Gear Space covers the engineering side of countertop cooking appliances — power draw, circuit loading, and why these machines fail. How we evaluate